Agents and Bots
How to attach a Bot to a Channel
A Bot Attachment joins one Agent to one Channel. It is the thing that makes the bot actually answer.
Updated October 4, 2026. Applies to the BotableX Staff Portal. For tenant admins.
A Bot Attachment joins one Agent to one Channel. It is the thing that makes the bot actually answer.
This is the step people forget, and it is the most common reason a Channel stays quiet. This article shows how to create one and how to switch it on and off.
Before you start
- You need the Bots permission (
bots.manage). - You need an Agent that already exists and is active.
- You need a Channel that already exists and is enabled.
- Only one Bot Attachment can be active on a Channel at a time.
Important. Making a Bot Attachment active on a live Channel puts the bot in front of real customers straight away. Check which Agent you are attaching before you tick Create as Active.
So how do you attach a Bot to a Channel?
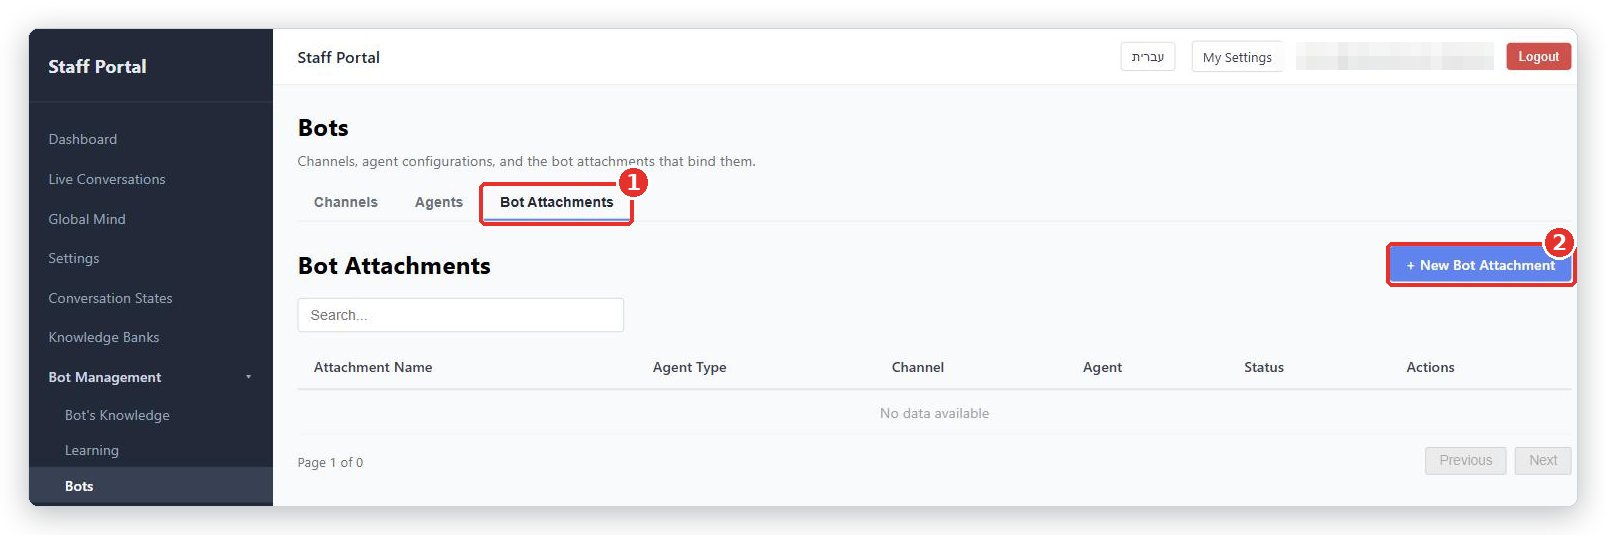
- In the menu on the left, open Bot Management, click Bots, and pick the Bot Attachments tab.
- Click + New Bot Attachment.
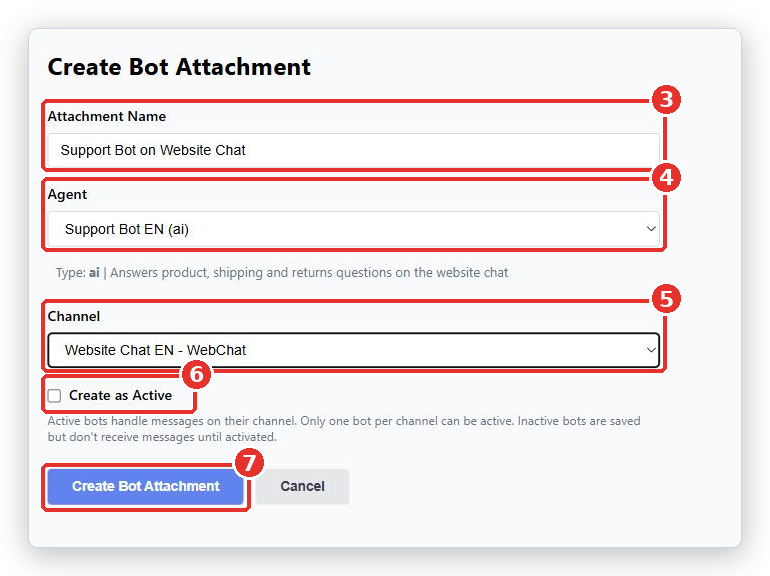
- In Attachment Name, type a name that says what is joined to what, such as
Support Bot on Website Chat. - In Agent, choose the Agent that should answer. Its type and description appear under the box so you can check it is the right one.
- In Channel, choose the Channel it should answer on. A Channel that already has an active bot is marked
(has active bot). - Tick Create as Active if you want it working right now. Leave it unticked to save it and switch it on later.
- Click Create Bot Attachment.
Switching an attachment on and off
Back on the Bot Attachments tab, every attachment is one row. The Status column shows Active or Inactive.
- Click Activate to switch it on. The bot starts answering on that Channel.
- Click Deactivate to switch it off. The bot stops answering on that Channel.
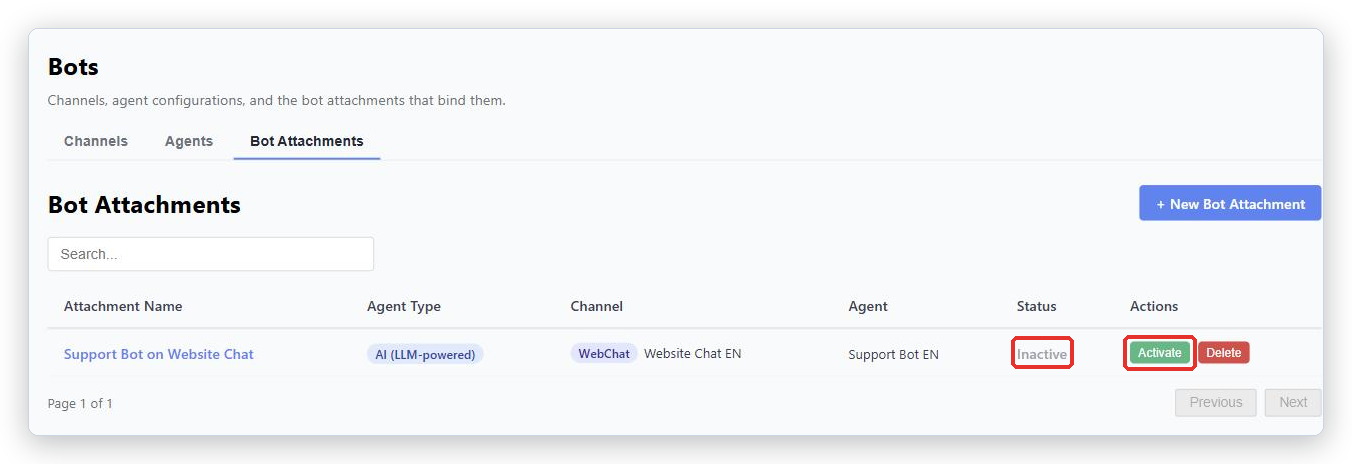
There is no “are you sure?” box on these two buttons. They take effect at once, so read the row before you click.
An Inactive attachment does not count. As far as the Channel is concerned, there is no bot.
Changing which Agent answers
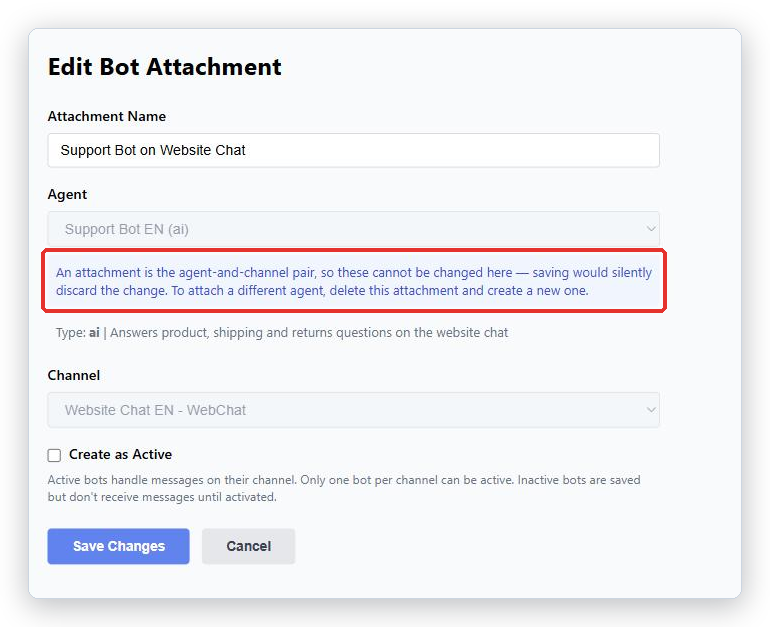
You cannot change the Agent or the Channel on an attachment after it is created. Both boxes are grayed out when you edit one, and the screen tells you why: an attachment is the Agent and Channel pair.
To point a Channel at a different Agent:
- Deactivate the old Bot Attachment, or delete it.
- Create a new Bot Attachment with the Agent you want.
- Make the new one active.
What happens when nothing is attached
If a customer writes to a Channel with no active Bot Attachment, the bot does not answer. The conversation is passed to a person instead. In the Channels list that Channel shows the badge No agent attached.
BotableX never picks a bot for you in this situation. It will not fall back to another Agent or to a default. That is deliberate: guessing which bot should answer a mailbox is how a bot ends up answering the wrong one.
Common problems
| Problem | What to do |
|---|---|
| This channel already has an active bot. | Deactivate the existing attachment first, or create this one without Create as Active and switch them over afterwards. |
| Failed to activate bot attachment. | Usually another attachment is already active on that Channel. Check the list and deactivate it. |
| The Agent dropdown is empty | You have no active Agents. Create one on the Agents tab first. |
| The Channel dropdown is empty | You have no enabled Channels. Create or enable one on the Channels tab first. |
| The Agent and Channel boxes are grayed out | That is normal when editing. Delete this attachment and create a new one instead. |
| Customers get an internal-looking message about no bot being attached | Create an active Bot Attachment now, then contact BotableX support and quote the message. That text is not meant to reach customers. |
Tip from the BotableX team. Name attachments
<Agent> on <Channel>. When you have several, the name alone tells you what each row does, and you will not deactivate the wrong one in a hurry.